Developing your own PHP Applications with Netbeans is very easy and require only a few steps to install and configure Nginx with PHP on your local Ubuntu System.
Note: An other Guide is available how to install Nginx with PHP on Debian.
1. Install packages
First step is to install the required packages php5-cgi, spawn-fcgi and nginx. While phpunit, php-pear and smarty are optional, one should install at least php5-suhosin for security reasons. However all together uses only 50MB of hard disk space:
$ sudo apt-get update
$ sudo apt-get install php5-cgi nginx spawn-fcgi php5-suhosin phpunit php-pear smarty
$ sudo /etc/init.d/nginx start
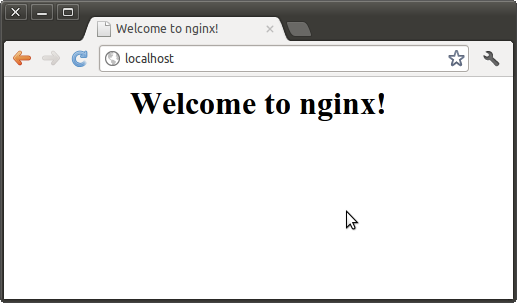
After that open a browser to http://localhost/ and verify Nginx is working:

2. Configure home directory
Netbeans will work with a public_html directory located in your /home/username folder. But Nginx can’t access them because of inadequate rights.

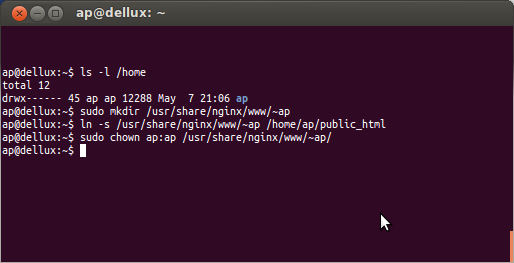
Instead of changing the permission and letting everyone access your home-directory (777 is indeed a bad idea), create a folder below the default Nginx directory with you username and appropriate permission (replace ap with your username/group) and pointing a symbolic link to it:
$ sudo mkdir /usr/share/nginx/www/~ap
$ ln -s /usr/share/nginx/www/~ap /home/ap/public_html
$ sudo chown ap:ap /usr/share/nginx/www/~ap/
If every thing works fine a 403 Forbidden Error is displayed at your localhost (because there is no file at the moment and directory listing is disabled by default).

3. Configure PHP
Edit the file /etc/rc.local and put the following line above the “exit 0″:
/usr/bin/spawn-fcgi -a 127.0.0.1 -p 9000 -u www-data -g www-data -f /usr/bin/php5-cgi -P /var/run/fastcgi-php.pid
Now on every reboot of you system it starts on localhost port 9000 the php fcgi parsing service. You should also type this command in your console (with sudo in front) to run it now.
4. Configure nginx
Now change the config file located at /etc/nginx/sites-available/default to enable and configure the php settings. Uncomment the following lines:
location ~ \.php$ {
fastcgi_split_path_info ^(.+\.php)(/.+)$;
fastcgi_pass 127.0.0.1:9000;
fastcgi_index index.php;
include fastcgi_params;
}
To ensure index.php files are parsed by default one can change the “index” setting, and to display all files in a directory add optional the “autoindex” feature:
index index.html index.htm index.php;
autoindex on;
Note: in my case there was no need to change php.ini, because “cgi.fix_pathinfo=1” is not active.
For testing you can create a index.php inside /usr/share/nginx/www/~ap/
<?php
phpinfo();
?>
and after a restart of your webserver you should see the phpinfo page
$ sudo /etc/init.d/nginx restart

5. Optional: Work with Netbeans
If one want to create a new project:
1. php -> php application
2. Name and Location -> select project directory, i.e. svn folder
3. Run configuration
-> Project Url: http://localhost/~ap/PhpProject1/
-> choose “Copy to Folder”: /home/ap/public_html/PhpProject1
4. PHP Framework (select nothing)
7. Optional: PEAR
If one work with PEAR (PHP Extension and Application Repository) and want to install a beta package:
$ sudo pear upgrade
$ pear config-set preferred_state beta
$ sudo pear install XML_Serializer
$ pear config-set preferred_state stable
http://wiki.nginx.org/Pitfalls
http://wiki.nginx.org/PHPFcgiExample
http://wiki.nginx.org/NginxFullExample
http://nginxlibrary.com/resolving-no-input-file-specified-error/
http://wiki.ubuntuusers.de/nginx
http://netbeans.org/features/php/
I think this is one of the most significant information for me.
And i’m glad reading your article. But want to remark on few general things, The web site style is great, the articles is really nice : D. Good job, cheers
Thanks for sharing your thoughts. I truly apprecate your efforts and I aam waiting for your next write
ups thanks once again.